Showing posts with label Mavala. Show all posts

Thursday, January 9, 2014

GOT Polish: Pink Barbed

Another challenge for me this year is participating in the Golden Oldies Thursday a.k.a. GOT polish challenge. The idea is to show some love to our golden oldies, polishes that we've had for a long time. You can read more at the Crumpet. My participation also has something to do with me moving temporarily out of the country and having to choose only a fraction of my collection to carry with me. But you will hear more of that soon...
The first theme in this challenge was 'Pink'. Lucky me! This polish (and her sisters – I had to buy the whole line) are ones I've had for a looooonnngg time. Every time I use them, I love them, but then I somehow forget about them. Shame on me, because they_are_awesome!
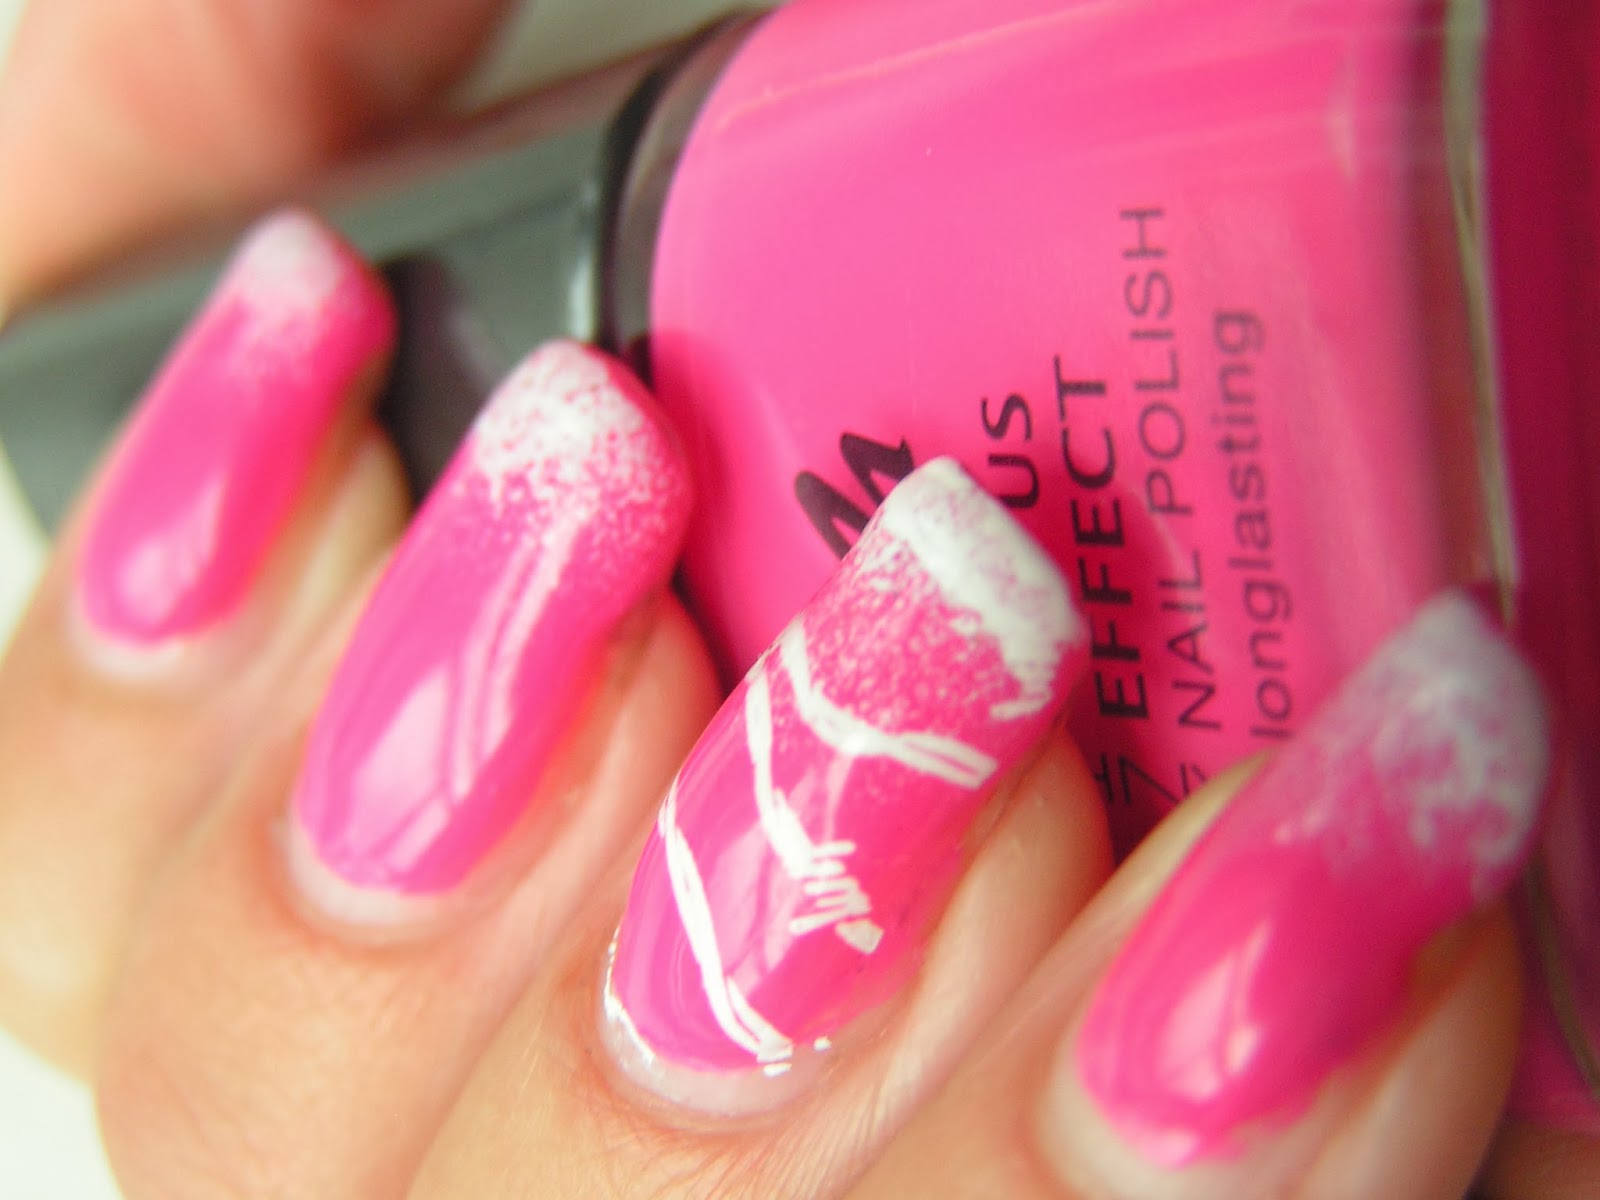
The pink here is Manhattan 51k. It glides on like butter, with absolutely no streaking, running, bubbling or anything like that.
Why do we start taking these perfect and faithful polishes -and sometimes people- for granted, forgetting to be thankful for their existence?  That stops right here! Thank you, all you lovely readers, lovely polishes and all my dearest ones, just for being there!
Ok, back to the business!  For this manicure I stamped on barbed wire from BM323 and used a kitchen sponge with Mavala white to the tips. Voilà! Now let's see what the others have been up to..

Tuesday, October 8, 2013

We Have a Winner!!

Remember the giveaway I had?

We have a winner - And she is:

Katariina

Congratulations!!
She has been sent the prize, and hopefully she has already received it and is now messing around with these topper goodies..

Thank you for all my followers, old and new, for sharing your polish shopping tips and other thoughts with me in this giveaway! I can't tell you how much the interaction with you means to me!
Here's a pic of a mani I wore recently to keep your interest up :) I used a Manhattan polish, Mavala white polish sponged on the tips and stamped on the barbed wire from a BM plate.
There is more to come - in the nail art front as well as the interaction front...

Thursday, April 18, 2013

Tri-Polish Challenge: Monarch and Other Butterflies

It's the second day out of four in this months Tri-polish challenge, and I'm still on schedule! Yay for me! Keeping up with schedules is not my strongest point - at least if it's only me who benefits/suffers. I very extremely seriously sincerely hope, I'll get better on it... Any procrastinators out there, who know how bad it can make you feel?
What?!? You did come to my blog to see pretty nails, not to read a random rant???!! Alright, here's some prettiness for you.
The base here is, again, China Glaze Papaya Punch. On it I stamped some butterflies from m40 with Konad black special polish and coloured them using a toothpick and the other two challenge polishes: ChG Turned up Turquoise and Sinful Colors Cream Pink.
 On the accent finger I went for a monarch butterfly design: sponged gradient on the orange with Cream pink, painted black sectors using a Mavala Black polish and nail art brush, and added white dots covered with turquoise.
 The thumb got a simple design: a line of dots in alternating colours. (In a hurry? me?!?)
Let's see what others have created today:


Friday, March 29, 2013

Happy Easter Nails!

Ok, I know that the Easter is not just about bunnies and birdies and chocolate,  (Don't get me wrong, my Easter is quite much about those three, especially chocolate...) but I couldn't resist the urge to do a super happy easter manicure.  Have a happy weekend, whether you celebrate Easter or not!
On the left hand I used:
two coats of SpaRitual Moss on all the nails
two coats of Lumene Summer Rain on ring & pointer
two coats of Kleancolor Green Holo on the middle finger.
On the right hand I used:
Orly Spark all over
Attitude Lemon Sherbet on the ring & pointer
Kleancolor Holo Yellow on the middle finger
To decorate, I:
Painted the grass and the chick with Moss & Spark
Added eyes with Mavala Black and White, beak with China Glaze Papaya Punch and footprints with Mavala Black.
Finally, I added some fimo slices to the right hand.
A Coat of Seche Vite, and I was happy. Sometimes it's indeed the small things that matter...


Friday, November 16, 2012

No H8!

Lately I've seen a lot of posts against bullying in the nail blog world and a bunch of beautiful no hate manicures, and I had to add mine.
 Actually I really felt the urge to do this manicure and post it after reading Veronicas post at her blog "Gorgeois"
She shares her story of being bullied in a way that is very touching, extremely mature plus totally brave. I really admire her for that, and I relate to her post more than I would actually want to.
 Basically, her idea (and mine) is that you don't win hate by creating more hate. You can choose to act against bullying if you have the resources, you can choose to concentrate on the good things in your life, you can let people know they're making a mistake or acting thoughtlessly (as we all do from time to time), but fostering hate does not get you anywhere.
Alright, end of rant and onto the polish...
The base polishes I used for this "Love, no H8" manicure were Essence Show your feet Purple Magic and China Glaze Señorita Bonita.
On the pinky I stamped a partial image from BM209 with Gosh Silver. On the ring finger of my right hand there's the No H8 logo with the polishes mentioned in this post together with Mavala Black, and left hand has a flower sort of thingy. Middle finger boasts Lacquistry Lilacquistry.
And the pointer is coated with the lovely Nfu'Oh 50, plus a black heart stud. I felt the heart stud was really appropriate - to exclamate love in all its richness and variety of forms, to leave behind any hate cycles that could entagle us all.

Wednesday, August 1, 2012

Red Ombre

Sometimes you feel your life is totally out of your hands. All the big things go to ass's arse, and the more you try to do about it, the more mess you make.
 Then it's the perfect time to take out your swatchsicles (or stamp collection, or whatever makes you tick). You organize it once again, marvel your collection, play around with it and get to organize everything again. And bit by bit you forget all your bad stuff -at least for a moment- and start to think everyhting is organizable if you take it in small enough portions.
 This is one of my best ever ombre manicures, created on one of those days full of swatchsicle therapy. I love the effect, how the polishes were almost the same colour unless you followed the whole colour change from pinky to thumb or the other way round. I'm sure I left a few people wondering, if they saw what they thought...
 The polishes from pinky to thumb are:
Essie Orange, It's Obvious
Essence Colour&go Wake Up!
China Glaze Pure Torture
OPI Off With Her Red
Essence Circus Circus Applause Applause red creme
To approach the fine world of "nail art" I added some somple white dots with Mavala white. I felt like Minnie Mouse! :)
I liked being dotty, but it was a shame the dots hid most of the ombre effect. In this case, I couldn't have it all.

Monday, January 2, 2012

SH Wavelength Punk'd

After a season of reds and dark autumn colours, I simply had to get something pink on my nails. So I searched the net for inspiration and came across with this tutorial by Miss80Million for punky pink nail art. I knew I had to copy it instantly. Miss80Millions blog has a lot of tutorials, so it's a great place to search for inspiration - go and check it out if you're in need!
I saw a possibility to use a polish from my untrieds (There are still "some" from my November haul and I just ordered a few bottles more... Just don't tell anyone, ok?) So I chose Sally Hansen HD Wavelength as my base colour. It needed three coats, but resulted in an awesome smooth color-shifting shine.
Following the tutorial, I taped my fingers and painted the stripes Mavala Black. I also had to add some finishing touches with Essence I Love Berlin black striper. The silver dots were put in place with the good old Gosh Silver.
The original had a rhinestone detail, but I was lazy and added dots on the accent nail instead. I got a bit carried away with my dotting tools :)
This was a fun mani, but it survived only for a day. The index finger had a disturbing resemblance with the confederate flag, and besides I had to get my hands on some glitter. You'll soon see a bit of glitz in this little blog!

Monday, December 26, 2011

Day 30: Inspired by a Tutorial

This post contains a whole lot of my family's Christmas nails, so be prepared for a pic-heavy post!

These nails were not strictly speaking inspired by a tutorial, but a great nail blog I found just recently: Rin's nail files. She had the theme "25 days of Christmas", with a daily mani idea, each with perfect how to's so you could almost consider them tutorials.
After that sneak peek to my own Christmas nails, let's take a look at reindeer nails I made for N:
For the first time in this blog you see a photoshopped pic. Poor N's cuticles looked so frightening in a close-up, I had to edit them with one eye closed... But the reindeer really melts anyones heart! You can take a look at Rin's reindeers here!
And then to the colours I used:
All fingers except the accent nail had two to three coats of China Glaze Ruby Pumps. The base of the reindeer fingers was two coats of Revlon Frankly Scarlet, The reindeer itself was painted with OPI A-Taupe the Space Needle, antlers and details with A-taupe mixed with white. Black and white polishes were both from Mavala. And the reindeer's nose is a big shiny blob of Ruby Pumps - what else!
For T I made nails with a snowy landscape:
These were really simple to make with a nail art pen. In small details like this I really prefer pens to brushes of any kind. Rin's landscape can be found in this link.
I love the look of Russian Navy Suede with a topcoat. It really is a unique shimmer: very wintery!
And then the polishes:
Base: OPI Russian Navy Suede, glitter near the cuticle OPI Last Friday Night, some additional larger glitter from Milani Jewel FX Silver. Details with Essence Nail Art Pen in Silver White
My own Christmas nails were made and pictured in a slight hurry, but I actually liked them a lot. I let T and N choose the theme, and they demanded Christmas tree nails, so here we go:
The base was a combination of various polishes, which made it lively and sparkly. And the glitters I used for the garland striping behaved surprisingly well. This mani is not directly inspired by any specific design, but I wanted to include in this post all of our Christmas nails.
The polishes used were:
two coats of China Glaze Cha Cha Cha
a coat of Sinful Colors Treasure Island
a coat of NfuOh 39
stripes with Sally Hansen Gem Crush Lady Luck and Essence Colour&go Make It Golden
I hope you are not yet too sick of Christmas - there is still one Christmas mani coming up. That'll be the last one, and that's a promise!

Thursday, September 8, 2011

Flowery French

This is a mani I did for my mother, so don't expect anything too fancy.
She had her base coat on, which is Mavala 2-phase nail strengthener.
I Konaded a white flower design from m2 with white special polish and then painted on a coat of Nubar Electric Touch. It's a baby pink polish with a very prominent UV-blue flash.

I like how the polish added on top of the stamping kinda softens the edges of the pattern. Dreamy! My mum agreed to have some glitters added. Woo-hoo! I really don't know how to call the glitter pieces, actually. Glitter flakes? Glitter shapes? I feel that writing just "added some glitter" would point to glitter polish with a coat of -well- glitter. Could I write "added A glitter"? Oh well, you know what I mean anyways.