Showing posts with label Borghese. Show all posts

Tuesday, February 19, 2013

Water Spotted Comparison 2

This is the take 2 of my experiment with different products to achieve the water spotted look.
You can see my previous comparison here, and find some links to tutorials, too, if you're new to this technique.
I used the two winners of my previous comparison - a haispray and a perfume - plus a few new challengers :) Another hairspray, rubbing alcohol and a mix of gel hand sanitizer and rubbing alcohol. The black polish I used was, again, Borghese Notte Black.

Perfume
The perfume performed well, like the last time. The spots were even in size, and clearly defined - although they look small in the pic. Me like!

Nelly hairspray
Nelly hairspray created larger spots, which do not resemble the original black spotted effect, but which I like nevertheless. A win!

Giorgi hairspray
This hairspray really made a difference with the polish in my cup. I liked the even structure of the pattern, and tried to spray it from further away, but still got more of a web than spots. A fail.

Rubbing alcohol
With rubbing alcohol I got a bubbly surface and too small holes. There were some areas, however, that would have been ok to dip. Still fail-ish.

Mix 
 My mix contains about 1/3 of CVS greenish hand sanitizer gel, and the rest is just rubbing alcohol. The result was very different from the pure rubbing alcohol, although I tried to spray from the same distance and with the same force. But the spots were much better defined and evenly distributed with this one. I could almost have dipped two nails in there. A win!

And then some colour.
 Of course I had to try these water spotted options on polish. My base polish here - for the maximum contrast - is Color Club Psychedelic scene.
Here are the different spotted styles on my nails:
thumb: prefume
pointer: sanitizer mix
middle: alcohol
ring: Giorgi hairspray
pinky: Nelly hairspray
In my books the winner is the mix of gel hand sanitizer and rubbing alcohol. Colette also found out a similar mix did it for her - so I'm in a good company :) I will continue using the Nelly hairspray, too, for the larger spots look (and because it's a lousy hairspray, LOL).

I hope this was useful to some of you. And please share your experiments and experiences!

Tuesday, January 22, 2013

Water Spotted - Comparison

I've been waiting for a way to DIY the OPI Black Spotted nail polish (the one released as a part of the Spiderman collection, France Exclusive). Instead I've seen a lot of water spotted nail art - which is more fun, actually! You can use any colour, and you don't have to dedicate a polish for the spotted look only.
There are great tutorials out there, for example by Colette from My Simple Little Pleasures and Cutepolish. Now I just needed to find out, what product would work for me. And maybe this comparison helps you a bit, too?
I used six different products, including a facial mist, two hairsprays, two other hair products and a perfume – basically every spray product I had at hand. I didn't use hand sanitizer, because I didn't have any in spray form, and I wanted to see if some of these worked.
I tried these with Borghese Notte black. The ones that made their way on my nails, went over my current manicure: a coat of Sephora Diving in Malaysia over black, sponged with Catrice Iron Mermaiden. Let's see what happened!

Frantsila Organics Rose Water
(main ingredients: rosa damascena distilled hydrolate)
 Rose water made spots, but mainly formed a bubbly surface on the top of the polish. A fail.

TIGI Bed Head Masterpiece hairspray
(Alcohol denat., Dimethyl ether, acrylates)
This hairspray just seemed to push polish around, no matter from how far I tried spraying it. Some small spots appeared, though. Still a fail.

Nelly hairspray
(Isopropyl alcohol, Methylal)

This hairspray created a spotted pattern, but the spots were rather large. They grew even larger if I waited for too long after spraying. A kind of a success.

Curly Sexy Hair Curling detangler
(water, amodimethicone, tallowtrimonium cloride, some proteins)
Was somewhat foamy and made a bubbly finish. A fail.

Schwartzkopf Osis iron serum
(water, alcohol denat., vp/va copolymer)
Spots and bubbles mixed, but the spots were tiny. A fail. I didn't try it on the nail, though - the spots might have grown a bit.

Aqua de Loewe perfume
(80% alcohol)
Genuinely spotted pattern. The spots grew larger with time with this one, too. A success.

From these products clearly the best two were Nelly hairspray and the perfume. You can see the results below. The perfume costs 30ml/ca 25 euros, versus Nelly hairspray 125ml / ca 2 euros... Hmmm... Which one would I like to "waste" on my nails? Plus I actually like the "bigger spots" effect of the hairspray experiment. With the hairspray the spots were also sharper than with the perfume (no, it's not because of the pic only).
Pinky (lower): hairspray, Ring (upper): perfume
So, in conclusion, products containing a lot of water didn't work. Products containing a lot of alcohol worked better, except the TIGI. But presumably it's not all about the alcohol content, because Colette did try with pure alcohol and reported it didn't work. Next time I'll make a comparison between these two and a hand sanitizer. I just have to find a spray, or dilute my own as Colette did.
Until the next time, then!

Thursday, April 12, 2012

The Girl Who Was (by the cosy) Fire

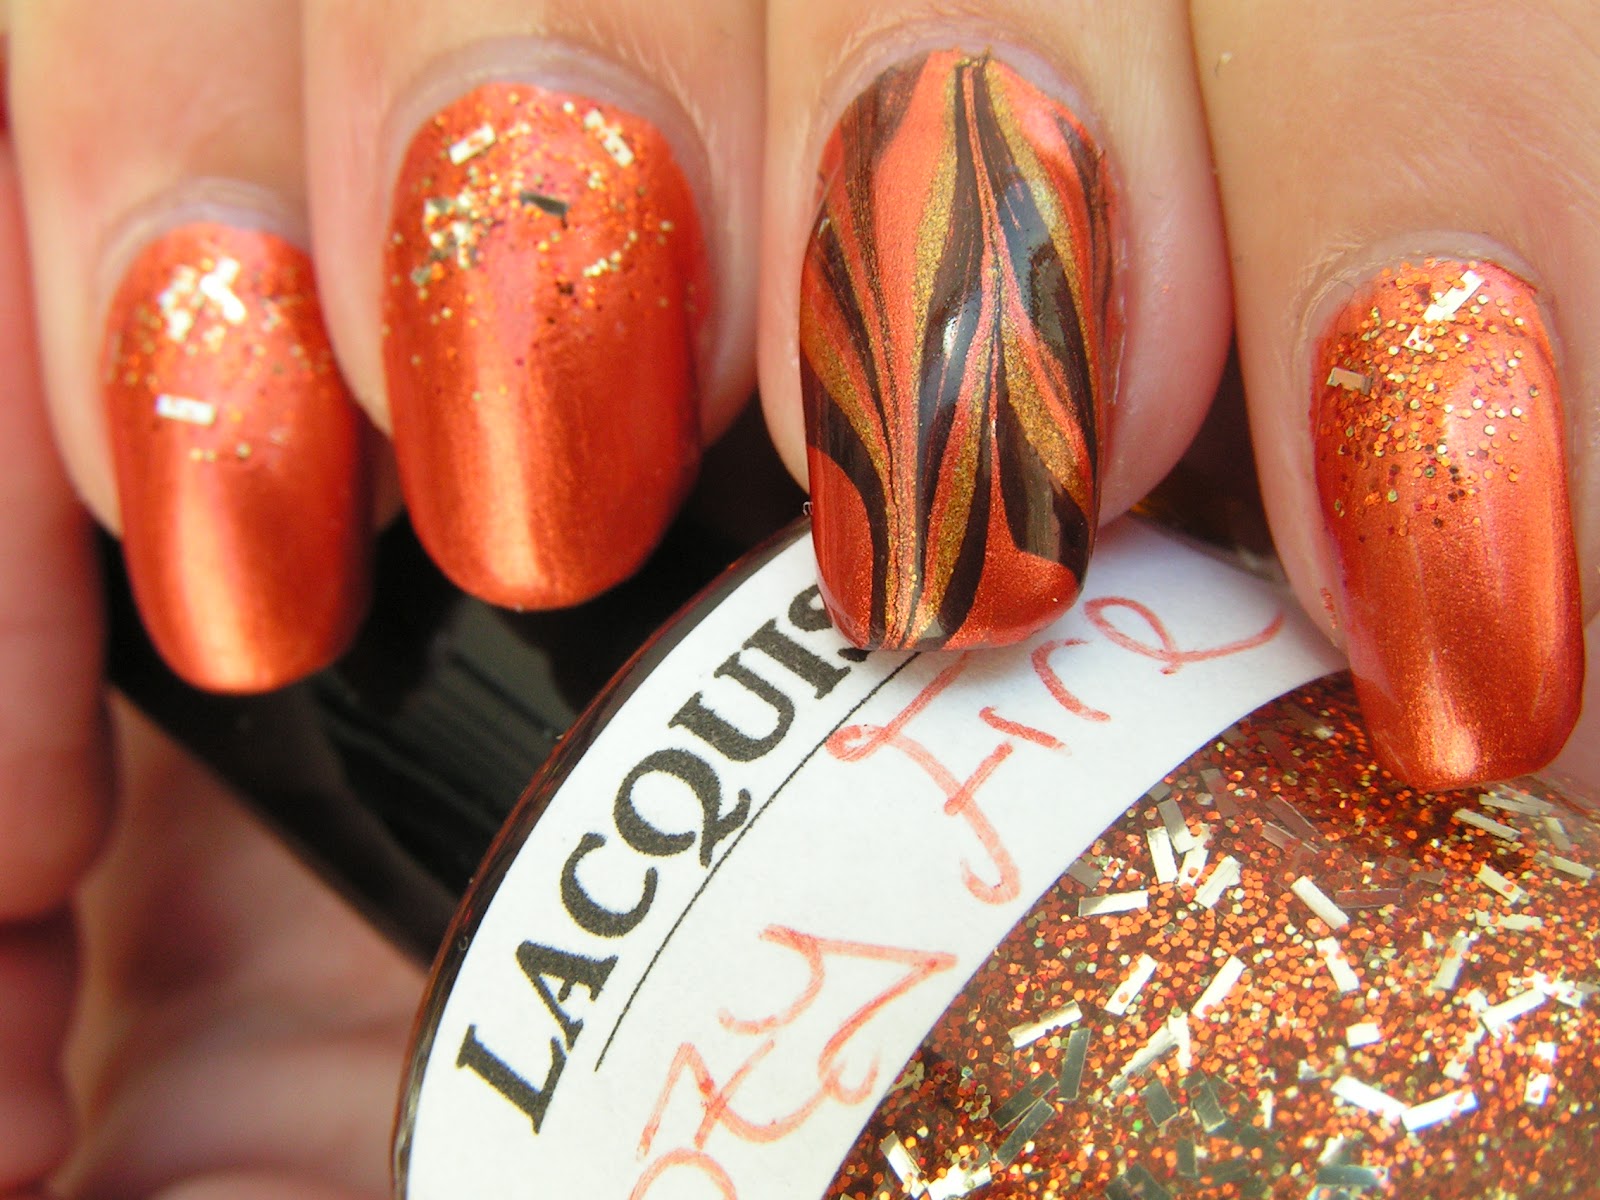
I'm a little late with this one, but today's mani is my take on The Girl Who Was in Fire nails. I saw a lot of those when the movie premiered, and some fine hand painted mockingjays, too! So I decided to take a different course...
I woke up to the existence of The Hunger Games books only when the polish collection from China Glaze came out, had just run out of easy reading for the train trips, and decided to download the books on my iPad. Yes, they seemed to be directed to teen audience, and yes, I stayed up reading until 3 o'clock one night when I couldn't put the book down.
The base is two coats of Catrice Bring Me Terra Copper (what does this polish name refer to, anyway?), a dead dupe for Essence Colour&Go Be Optimistic from the same manufacturer. This isn't the first time this has happened with Catrice and Essence...
I had the Lacquistry Cosy Fire still in my untrieds (shame on me!), and of course I had to use it for this mani! I sponged it near the cuticles, and topped off with Seche Vite.
On the accent nails I did a water marble with Borghese Notte Black, BMTC and OPI Bling Dynasty. I'd say the water marble turned out ok. I went through a lot of polishes though, and was desperate because none of them seemed to spread well and not blend with each other.
Here are the polishes:
Lacquistry Cosy Fire
Catrice Bring Me Terra Copper
Borghese Notte Black
OPI Bling Dynasty

Saturday, December 17, 2011

Day 27: Inspired by an Artwork

The work of art I was inspired by, is the Botticelli's "Birth of Venus". Why the most used and abused painting in the world? Well, just because of that. The painting seems to haunt me. In every other hotel room and restaurant I go to, it's there. In the most memorable cases with "Con te partiro" playing in the background..
I didn't even dream of replicating the painting on my nails. Instead,  I picked the different colours and patterns from the artwork: the peach flowered fabric on the right, the Venus's hair, the seashell and the flowers on the blue sky/sea background.
The base colours of this mani were (from right to left in the painting, from pinky to pointer on my nails): China Glaze Peachy Keen, Orly Spark, OPI I Vant to be A-Lone Star with Borghese Luna Pearl and China Glaze Secret Peri-Wink-Le. All were two coats.
Then to the patterns. Pinky and pointer were stamped with Konad white Pearl and Green princess stamping polishes, using m53. Finally I added some pink to the flowers with a nail art brush and OPI Sparrow me the Drama. (Could've done without that!)
Ring finger, which was my favourite, was stamped by China Glaze Trendsetter and BM201.This was a great combo, trendsetter was perfect for stamping, and I'll be sure to try it again.
Middle finger and thumb were both painted some wide lines to resemble the structure of the seashell, with mix of I Vant to be A-Lone Star and China Glaze Concrete catwalk, and then topped off with one more coat of Luna Pearl. The lines don't show in the pics at all, which is a shame! 
And here are the polishes. I'm sure you can figure out, which one is which. If not, just drop me a line in the comments!
Only three more days to go with this challenge! Then I'll be showing you some of my holiday manis!

Friday, December 16, 2011

Day 26: Inspired by a Pattern

Today's manicure was inspired by the pattern of my official picnic dress, a checked tight-fitting number with a full circle dress. I feel so girly and rock chick in it at the same time. It's a shame it's too cold for this dress right now...
The base on this was Essence Urban Messages Skyscraper, which is a unique polish by itself, too. It's a off-white greyish base filled with light blue and grey microglitter. Odd one, but I like it!
The thicker lines were sponged (using scotch tape lining and a sponge tip eyeshadow applicator) with Borghese Notte Black. The thinner red lines were drawn with a nail art brush and Revlon's Revlon Red, and the green line with Essence Trust in Fashion.
 The accent finger got a rock'n'roll skull/tattoo sticker, and no stripes. This was the part of the mani I really loved! Luckily I have whole two sheets of these.. :)
And here are the polishes:
I wasn't too happy how this mani turned out, but I'll definitely see some tutorials and give checkers another go. Need to practice those lines before that...